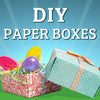
Practicing social distancing? Pass the time with Kaitlyn & Paul by making DIY paper gift boxes with supplies you have lying around the house. Plus, they double as perfect handmade baskets for Easter!
DIY Paper Gift Boxes
Supplies:
- Paper:
- Scrapbook paper
- Old greeting cards
- Old book pages
- Any paper around the house!
- Optional:
- Stamps:
- Scissors
- Ribbon
- Easter grass
Step-by-Step Instructions:
1. Start with a square piece of paper.
2. Place the side you want to be on the outside of your box facing down.
3. Fold in half. Open again.
4. Fold in half the other way. Open again.
5. Fold diagonally. Open again.
6. Fold diagonally the other way.
7. Open again.
8. Fold a corner to the center point.
9. Fold the second corner to the center point.
10. Fold the third corner to the center point.
11. Fold the final corner to the center point.
12. Place this now smaller square with one of its sides facing you (as opposed to a corner).
13. Fold the side up to the center of the square.
14. Fold the opposite side up to the center of the square.
15. Open up again to the smaller square.
16. Rotate the square and fold the other side up to the center.
17. Fold the opposite side up to the center.
18. Open up to the smaller square again.
19. Open up two of the triangle flaps on the square.
20. Fold the side facing you up to the center.
21. Fold up the other side to the center.
22. Lift up the folded sides to stay vertical.
23. Find where the bottom of your box is, and then push in to form a side.
24. Squeeze until the the triangle is pointing up.
25. Fold over the triangle and tuck it into the bottom.
26. Now do the other side. Push in where the side should be.
27. Squeeze in until the triangle is pointing up.
28. Fold over the triangle and tuck it into the bottom.
29. To make the bottom, take the same sized square as you started with, but trim it 1/4" smaller around the edge.
30. Decorate with bows, stamps or stickers, or just leave it plain!
Transcript
- Kaitlyn.
- What's up?
- I thought I would give you a little call. Since we're quarantined and all.
- Yeah, I mean, I've been like... just swamped with work, you know?
- You wanna see the most adorable thing?
- Yes. Did you hear your name?
- So anyways, I am very bored.
- You know what you should do, is the craft that we did the other week. 'Cause you don't really need to go to the store to buy anything. You can just use paper around the house.
- That sounds like the perfect self-isolating project.
- I agree. Oh hey there, stranger. Today we are going to make origami paper boxes. And they're so easy, and it's a great way to reuse paper that you have around your house. You could do scrapbook paper, old book dictionary pages, You could do scrapbook paper, old book dictionary pages, old cards, you can reuse it and make a cute little gift box.
- Let's begin. Look it I'm on this end of the spectrum. 'Cause you notice we wore our Sunday best.
- Oh yes, spring colors. What you're going to do is start with a square piece of paper, it needs to be square. Let me show you a trick if it's not. This is not square, it's a rectangle. Did you know that?
- Correct.
- You're just gonna fold it like this. A little corner up. And do a little snippy-snip, and then...
- It's a square.
- There you got a square. We want this to be the outside of the box, so we're gonna flip it over. First fold, are you ready?
- I'm ready.
- You're going to just fold it in half.
- [Paul] Whoa, slow down, slow down.
- The thing is, you kind of really want your folds to be precise 'cause the more precise the better the box, it won't be as wobbly. And then fold again the other way.
- So you're doing a hamburger and hotdog fold.
- I mean it's the same, they're two hamburgers. With fries.
- Doing a double patty.
- Alright, now what we're going to do is do it diagonally. Make a little triangle.
- And if you made a square out of a rectangle piece of paper you would have this fold done already.
- Oh, yeah, very good.
- Let me guess what the next fold is.
- 'Kay.
- Another diagonal?
- Very good.
- [Paul] I feel like this is the base to many origami projects.
- [Kaitlyn] Yeah. Very good folds.
- Thank you.
- So now we have all these cute little triangles shooting out. So now we're going to bring each corner to the center. So fold that--
- Wait, are we making one of those...
- Fortune teller?
- Yeah.
- No.
- [Paul] When I was a kid like you took those pretty seriously, you know?
- [Kaitlyn] Oh, for sure.
- It's kinda like the game MASH, remember that?
- You have like 17 kids, and you're living in a trailer park. And you're like, let me just do this again.
- Kids don't play games like that like they used to. Now it's all about the YouTubes and the...
- The TikToks.
- And the Flappy Birds.
- So now we have this little thingamabob. What we're going to do is bring this corner to the center now. We're just gonna fold it up. So just bring it to the center line. And then do the other side as well. Is that your stomach?
- [Paul] I'm really hungry.
- Very good, you're keeping up.
- This is my kind of project.
- Alright, so just gonna open that up again. So we have that flat. And now turn it and do the other side up. You can do little Easter baskets, you can do gift boxes. So now you can kinda see the start of our box. We're gonna take these flaps, just like open it up. just like open it up. Just two of 'em. And then we're just gonna fold this so this corner part is folded as well. And the other side as well. We're gonna lift these corners up. So it's like a little tunnel. This is the hardest part. 'Kay, deep breath. We're gonna get through this. Do you see where like the bottom of your box is, there? You're going to pinch it in to make some corners. You're going to pinch it in to make some corners. Very good. And then just fold this flap underneath. Pinch and fold. Pinch, fold. Pinch and fold. Pinch, fold. Pinch, fold, squeeze. Pinch, pinch, fold, squeeze. And squeeze. And squeeze. Pinch, fold, squeeze. And then the other side. Give her a little squeeze. Just like your sweetheart. If you really wanted you could tape this down, but it stays pretty good. So, no. See where your bottom is? You're gonna squeeze these.
- [Paul] Oh, I was squeezing too high.
- There ya go. And fold it in. Look at that. And then for the bottom, what you're gonna do is get the same size square and then just cut it like a half an inch smaller around the edge. So then it will fit perfectly into the bottom.
- [Paul] Like a lid?
- For some reason all the boxes are on the ground. Let me, one second. The cool thing about cards is that you have a top and the bottom. Here's your top, here's your bottom you just cut that and then make it into a square. It's like the best quality paper.
- It's thick.
- It's like sturdier, and it doesn't tear when you fold it.
- But here's some ways you can spice up your boxes. You can do a cute little bow over the top. You can do stamps like this. This is our Easter egg stamp set. You could put a wedding ring in here.
- Ah.
- Can you imagine?
- Oh. Well no, think. You could take the first card she ever gave you.
- Ah, that is beautiful.
- I'm actually starting to tear up saying that. Alright, well thank you for tuning in to watch how to make these beautiful, decorative, homemade boxes.
- Yeah.
- 'Cause you know what?
- Recycle, reuse...
- Refund. Your time from watching this video. And we'll put a... And we'll put a detailed instruction link. Nah, that's stupid. We'll put a link in the description for detailed instructions on how to make this. Have a happy Easter. And we'll see you next time.
- On Fake It Till You Make it. Thanks for watching mum! Love you
- Don't drop the egg. Oh!
-
Posted in
Easter, Fake It Till You Make It


